Why This Matters
Properly installed catch basins provide critical surface water collection while maintaining system integrity and allowing for easy maintenance access.
Adjust the Trench
Prepare the trench to accommodate the catch basin and ensure proper positioning.
- Ensure the trench is wide enough for the basin to sit flat and to allow other pipes to route around it, if needed
- The trench should be deep enough so that the pipe can plumb in straight and the top of the basin will sit 1–1.5" below natural grade
- If needed, backfill with gravel to raise the basin
- Measure and set aside the pipe you'll need for connections
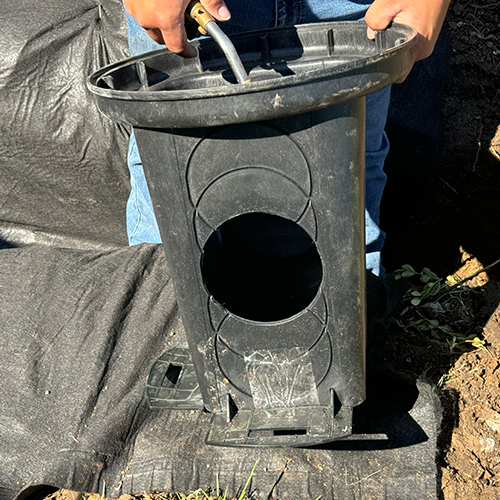
Cut the Basin Hole
Create precise openings for pipe connections using predefined knockouts.
- Select the predefined knockout that allows the pipe to sit flat in the trench
- If needed, warm the basin slightly with a torch to make cutting easier using a utility knife
- In most cases, you'll need to cut at least two holes
Drill Holes in Bottom
Add drainage capability to prevent water accumulation in the basin.
- Drill a 3/8" hole in the center of the basin to allow water to slowly drain in the hours after a rain event
Install Pipe Locking Rings
Secure pipes to the basin with the locking ring system.
Set aside the screws that come taped to the locking rings—these are used later for the basin lid. Install the locking rings to secure the pipe to the basin:
- The larger piece (labeled "1") goes on the outside with the bell pointing inward
- The smaller piece (labeled "2") goes on the inside
- Twist the inside piece clockwise to lock it in place

Trim for Pipe Size
Customize the ring opening to match your pipe diameter.
- Cut the predefined hole in the larger ring with a utility knife to match your pipe diameter (typically 4")
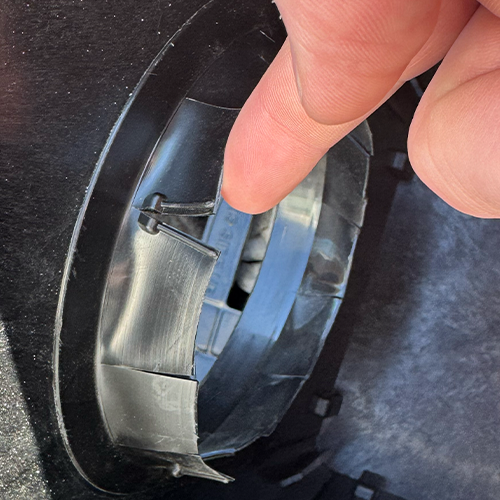
Create Flexible Opening
Create a flexible seal that accommodates pipe insertion and provides a secure fit.
- From the inside edge of the hole, cut slits outward about 1" apart all the way around
- This creates flexible flaps that allow easier pipe insertion and a snug fit
- This method helps hold the pipe in place since this joint is not taped
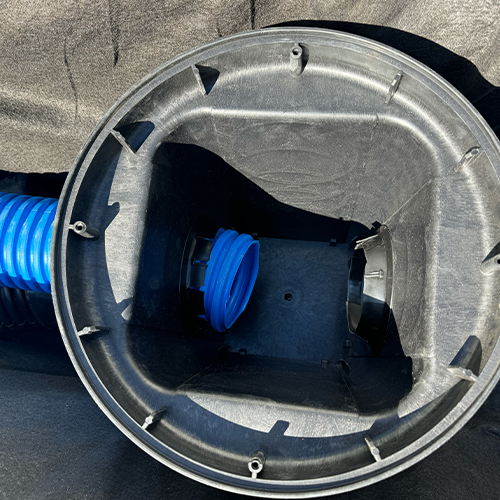
Insert the Pipe
Connect the drainage pipe to the catch basin with proper penetration depth.
- Use blue FrenchDrainMan pipe for catch basin connections
- Push the pipe into the basin, making sure it doesn't extend more than 2" (about 3 ribs) inside
- If needed, trim the excess using a Sawzall
Install Weight
Prevent basin flotation during heavy rain events for larger installations.
- For 20" or larger basins, place a concrete "biscuit" at the bottom
- This prevents the basin from floating during heavy rain events
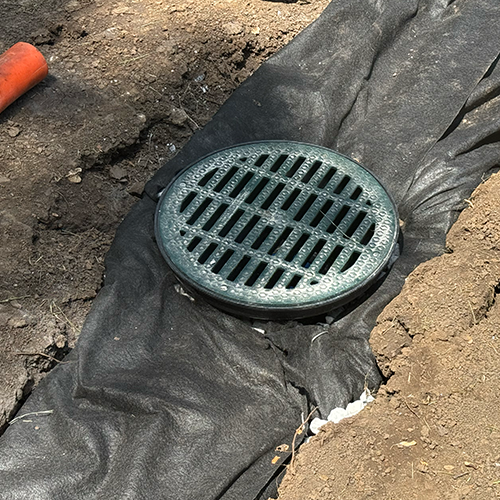
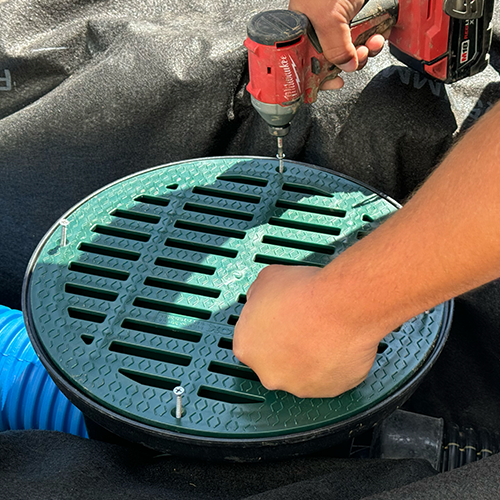
Attach the Lid
Secure the lid while protecting it during the remainder of the installation.
- Use the saved screws and a screwdriver to fasten the lid flush to the basin
- Do not overtighten
- If gravel will be added later (such as for a French drain), cover the lid with 4" pipe tape to keep it clean and remove it after backfilling
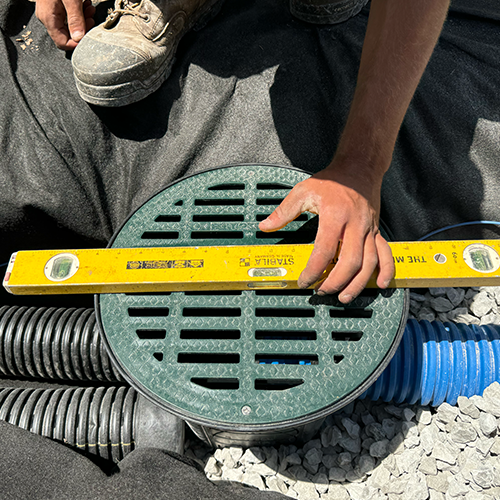
Level the Basin
Ensure proper grading for optimal water collection and aesthetics.
- Before backfilling, check that the basin is level and flush with the surrounding grade
- Adjust as needed during backfill
Cut Fabric
Integrate the catch basin properly with French drain fabric systems.
- If the basin is part of a French drain system, cut and wrap the drainage fabric around the basin, leaving space for the lid to sit flush